
In our last post, we explored what open models are and the advantages they offer. Now, let’s roll up our sleeves and look at several options for using open models in our projects. We’ll analyze these options starting with the simplest ones, and we’ll see how to implement our old friend, the grumpy chatbot, with each of them using Python.
External hosting
The simplest option is to use an external hosting service and have our application communicate using an inference API. There are many providers offering this service, such as AWS Bedrock or Beam, but for our example, we’ll use Groq. It makes several open models available through an API compatible with OpenAI’s, and is currently offering free access (with limits).
As is typically the case with any new external API we want to use, the first step is to obtain an API key. To do this, we’ll need to go to Groq’s website, create an account, and then navigate to the “API Keys” section to generate our API key.
The easiest way to use Groq API is through their library, which we can install with pip:
pip install groqUsing the Groq library is extremely similar to OpenAI’s. Like OpenAI, it will look for our API key in an environment variable by default, in this case called GROQ_API_KEY. Once that’s set up, the Python code for our grumpy chatbot would be:
from groq import Groq

messages = [{"role": "system", "content": "You're an old grumpy and cantankerous person. You respond to everything with complaints and apathy, although you end up helping with what you're asked."}]
client = Groq()
# The conversation will continue until we leave an empty message
while len(text_user := input("What do you want to say to the grumpy chatbot?\n> ").strip())>0:

    # Add the new entry to the list of messages, with role "user".
    messages.append({"role": "user", "content": text_user})

    # Call chat completions service to get the response from the model. Send the complete list of messages so the conversation context is not lost.
    stream = client.chat.completions.create(
        model="llama-3.1-8b-instant",
        messages=messages,
        stream=True)

    response_message = ""
    for chunk in stream:
        chunk_txt = chunk.choices[0].delta.content or ""
        response_message += chunk_txt
        print(chunk_txt, end="", flush=True)
    print("")

    # Display response and add it to the list of messages as role "assistant".
    messages.append({"role": "assistant", "content": response_message})
Groq supports multiple open models. In this case we are using Llama 3.1 8B, but that can be easily changed adjusting the model parameter when calling chat.completions.create.
Local execution
When it comes to running models locally, the range of possibilities is vast, with numerous tools, libraries, languages, and formats available. Each option has its own use cases, advantages, and drawbacks, and new possibilities are constantly emerging. As a result, it’s impossible to pinpoint THE definitive way to do it. That being said, I’ll describe a couple of methods for running models locally.
Ollama
The first method involves using Ollama, a tool that allows us to easily run language models locally. Ollama has many features that make it a good choice:
- It’s easy to install and available for Linux, macOS, and Windows.
- It automatically utilizes most GPUs available in the market (if you have one, which is highly recommended), multiple GPUs, or exclusively the CPU, without requiring additional configuration.
- It provides easy access to downloaded models through:
- Direct chat via command line.
- Locally published REST services.
- Libraries for Python and JavaScript.
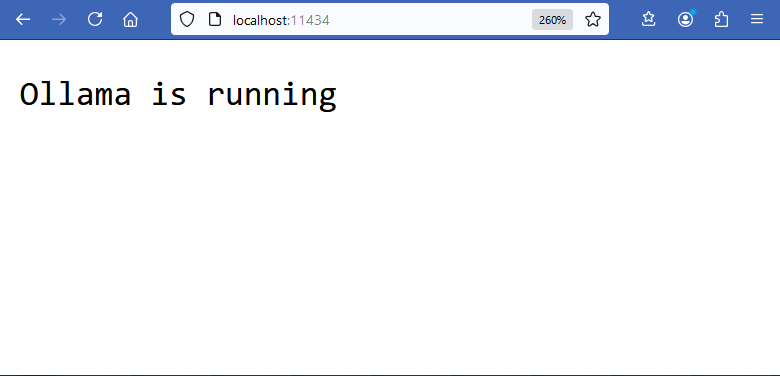
To start, we need to download Ollama from its website and install it. Once installed, we can do a quick check by accessing http://localhost:11434/ with our web browser. If everything is set up correctly, we should see the following:
To download a model from the list of models supported by Ollama, we’ll open a terminal and use the ollama pull command followed by the name of the desired model. For example, let’s download Phi 3.5, which is a lightweight 3 billion parameter model developed by Microsoft:
C:\>ollama pull phi3.5
pulling manifest
pulling b5374915da53... 100%████████████████████████████████████████████████████▏ 2.2 GB
pulling c608dc615584... 100%████████████████████████████████████████████████████▏  149 B
pulling c5f9f560a704... 100%████████████████████████████████████████████████████▏ 1.1 KB
pulling 45ac4c662a77... 100%████████████████████████████████████████████████████▏   60 B
pulling 0611867ea67b... 100%████████████████████████████████████████████████████▏  409 B
verifying sha256 digest
writing manifest
success
To check the list of model we have downloaded we can use the list command:
C:\>ollama list
NAME            ID              SIZE    MODIFIED
phi3.5:latest   61819fb370a3    2.2 GB  About a minute ago
Once the model is downloaded, the most direct way to start interacting with it is using the run command:
C:\>ollama run phi3.5
>>> Hi. Who are you?
Hello! I am Phi, an artificial intelligence designed to interact with users like yourself and provide information or assistance as needed. How can I help you today?

>>> Send a message (/? for help)
Ollama’s console interface is quite basic, though it offers a good number of options. But the interesting part is that once the model is downloaded and Ollama is running, it’s accessible for other applications or tools to use. For example, we can install Open WebUI to have a complete web interface using our local model.
And of course, we can also use our local model from our own applications. As you might expect, we’ll adapt the grumpy chatbot as an example to run using our newly downloaded model.
We’ll start by downloading the Ollama library for Python:
pip install ollamaIn this case we will not be calling any external APIs, so we won’t be needing an API key. This would be the code to get the grumpy chatbot working using phi 3.5 through Ollama:
import ollama

messages = [{"role": "system", "content": "You're an old grumpy and cantankerous person. You respond to everything with complaints and apathy, although you end up helping with what you're asked."}]

# The conversation will continue until we leave an empty message
while len(text_user := input("What do you want to say to the grumpy chatbot?\n> ").strip())>0:

    # Add the new entry to the list of messages, with role "user".
    messages.append({"role": "user", "content": text_user})

    # Call chat completions service to get the response from the model. Send the complete list of messages so the conversation context is not lost.
    stream = ollama.chat(
        model="phi3.5:latest",
        messages=messages,
        stream=True)

    response_message = ""
    for chunk in stream:
        response_message += chunk["message"]["content"]
        print(chunk["message"]["content"], end="", flush=True)
    print("")

    # Display response and add it to the list of messages as role "assistant".
    messages.append({"role": "assistant", "content": response_message})
Hugging Face Transformers
Hugging Face is a platform dedicated to artificial intelligence. They host an extensive repository of models and datasets, many of which are uploaded by community members. They also publish their own Python library for handling AI models called Transformers, which we’ll be using now.
The Transformers library does much more than just inference. We can use it to interact with Hugging Face models, train them, fine-tune them, and more. To use it, we’ll need to have a deep learning library installed and configured, typically PyTorch, although it’s compatible with others. Depending on your machine and operating system, properly configuring PyTorch to efficiently use your hardware can be challenging. If you only want to do inference, the simplest option is to use Ollama. However, if you want to pave the way for more advanced usage, such as training or fine-tuning your own models, let’s proceed. In any case, we won’t go into detail about PyTorch installation in this post.
To get started, the first step is to go to the Hugging Face website and sign up. Once you’ve done that, go to the Profile > Access Tokens section and create a new read token:
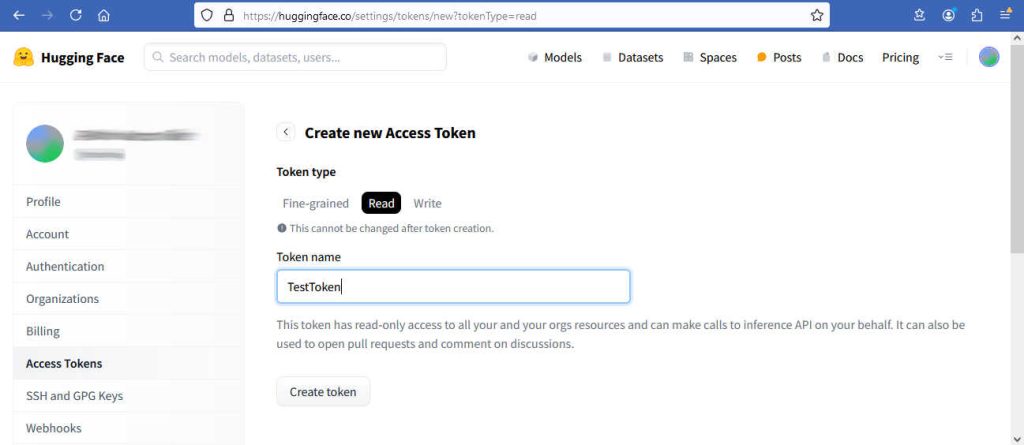
We’re going to use the gemma-2-2b-it model, which is the instruction-tuned version of the Gemma 2 2B model, an open-source model trained by Google. Google allows anyone to download this model, but requires users to be logged in and accept the terms and conditions. Once you’ve done this, Hugging Face will allow you to download it, and to do so directly from the Transformers library, we’ll use the read token as a way to identify ourselves.
As our last preparation step, we install the Transformers library in our environment:
pip install transformersNow we can implement the grumpy chatbot using this model through the Transformers library:
from transformers import pipeline

# Gemma 2 doesn't support system prompts
messages = [{"role": "user", "content": "You're an old grumpy and cantankerous person. You respond to everything with complaints and apathy, although you end up helping with what you're asked."},
            {"role": "assistant", "content": "OK."}]

pipe = pipeline(
    task="text-generation",
    model="google/gemma-2-2b-it",
    device="cuda",  # "mps" for Mac, "cpu" if no GPU
    token="HF_TOKEN",
)

# The conversation will continue until we leave an empty message
while len(text_user := input("What do you want to say to the grumpy chatbot?\n> ").strip())>0:
    # Add the new entry to the list of messages, with role "user".
    messages.append({"role": "user", "content": text_user})

    # Generate the model's response using pipe. Send the complete list of messages so the conversation context is not lost.
    response_message = pipe(messages, max_new_tokens=256)[0]["generated_text"][-1]["content"]

    # Display response and add it to the list of messages as role "assistant".
    print(response_message)
    messages.append({"role": "assistant", "content": response_message})
A few notes on on the call to pipeline():
- If we identify the model (using the model parameter) only by its name, the library will handle downloading it on the first run if it hasn’t been downloaded previously.
- For this download, since the Gemma model requires us to accept the terms and conditions before downloading, authentication will be necessary. We provide this using our read token in the token parameter.
- If we don’t want to include the token in our code, we can download the model beforehand and then simply use it as follows:
- Run git clone https://huggingface.co/google/gemma-2-2b-it, and when prompted for authentication, enter our Hugging Face username and the read token.
- Alternatively, we can download the model files directly from the Hugging Face website. If we do it this way, there’s no need to create a read token.
- In the model parameter, specify the path to the directory where we’ve downloaded the model.
- Remove the token parameter.
- We’ll need to adjust the device parameter based on the hardware we’ll be using for inference: cuda for GPUs on PCs, mps for Mac chips (which have integrated GPUs), or cpu if we don’t have a GPU available.
As always, all the code from the examples we’ve been looking at is available on GitHub.